
6.5 KiB
- 原文地址:Android O: Fonts – Part 1
- 原文作者:Mark Allison
- 译文出自:掘金翻译计划
- 译者:
- 校对者:
Android O: Fonts – Part 1
In March 2017 Google announced the first release of the Android O developer preview. In this occasional series, we’ll look at some of the new features being introduced in Android O. In this article we’ll look at something very close to my heart: Better font support.
 Font support within Android has long been a pain point for many of us. To deviate from the standard system fonts has required the use of third-party libraries (such as Chris Jenkins’ Calligraphy or Lisa Wray’s fontbinding), or by having to subclass TextView in order to add custom font support. While both Chris & Lisa’s libraries (and any others I may have missed) do an excellent job of enabling the use of custom fonts, it has been a point of frustration that such a fundamental part of UI design and implementation has not been addressed directly within the Android framework itself. All that has changed in the O developer preview, and there are noises coming from Google that it may be rolled out in to a support library as well!

Using custom fonts within our apps is now stupidly easy! The support library implementation may not be quite as seamless as this but, rest assured, that if there are any significant deviations from the native implementation if / when the support library implementation is released, we’ll cover the differences on Styling Android.
Firstly, it is worth pointing out that I am using Android Studio 3.4 Preview 3 – some of the features shown here are not available in earlier versions. All of the fonts that I am using in this example code are part of the 2016 Fonts Refresh collection on Google Fonts. Google Fonts is a great resource for open source fonts which can be freely used in apps.
Lets start by adding Pacifico a script font which has a single style. We’ll look at adding multiple-style fonts shortly, but we’ll start with just about the simplest use-case possible.
The first thing that we need to do is include the font in our APK. I downloaded Pacifica from Google Fonts, and it comes down as a TrueType font inside a zip archive. You’ll need to unzip the archive to obtain Pacifico-Regular.ttf. Next we need to add this as a resource in our project as there is a new font resource type. First we need to create a new font resource folder (click on the GIF to see it at full resolution):
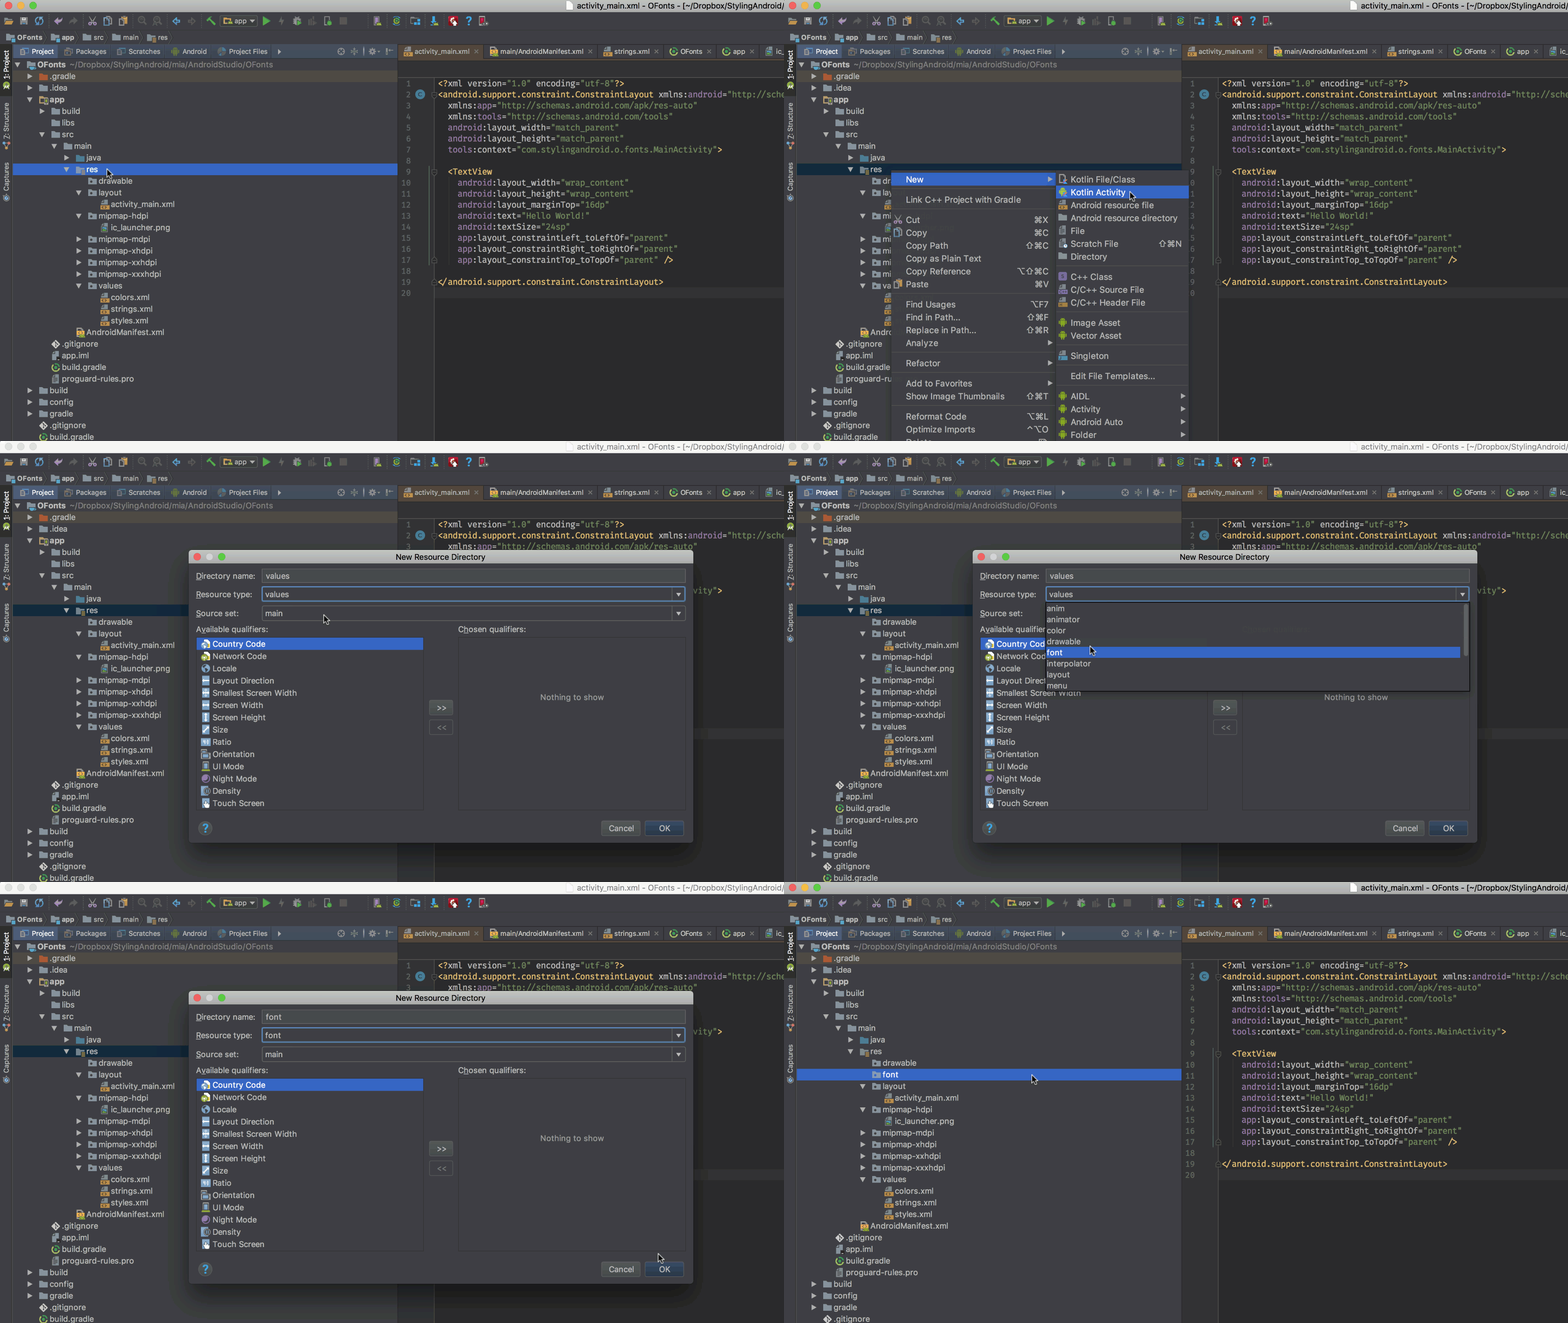
Next we need to copy our .ttf font to this new resource folder:
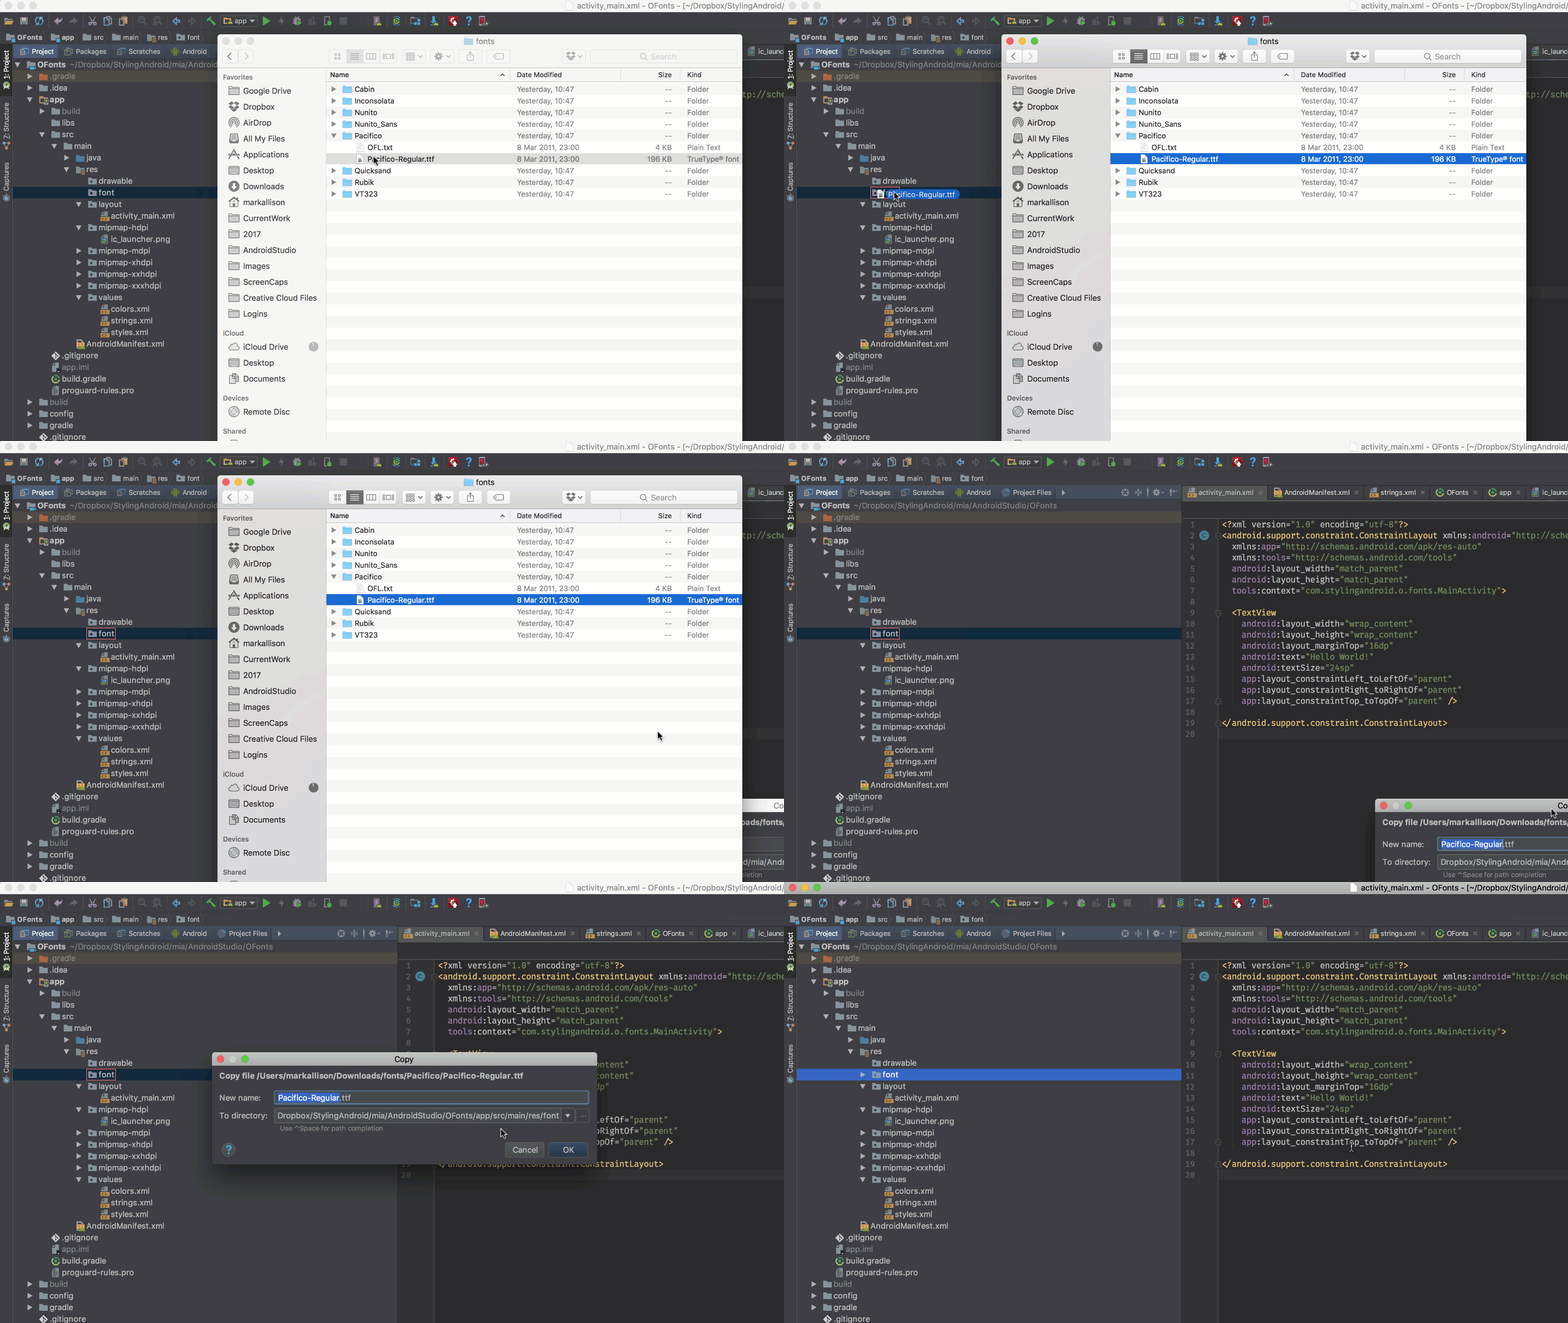
If you actually try and build this it will fail. The reason being that the font that we copied in is named “Pacifico-Regular.ttf” and this breaks the naming rules for Android resources which cannot contain dashed or capitals. So we’ll rename this to pacifico.ttf.
One nice feature of Android Studio is if you open the font file, it provides a preview of the font:

That’s the font imported in to our project, to use it is simplicity itself:

Simply specify the name of the font resource we just added in the android:fontName attribute. Because it is a resource, we’ll get autocompletion in the IDE, and our layout preview will display the correct font, as well (you may need to refresh / rebuild your project after adding a new font resource for the preview to work correctly):

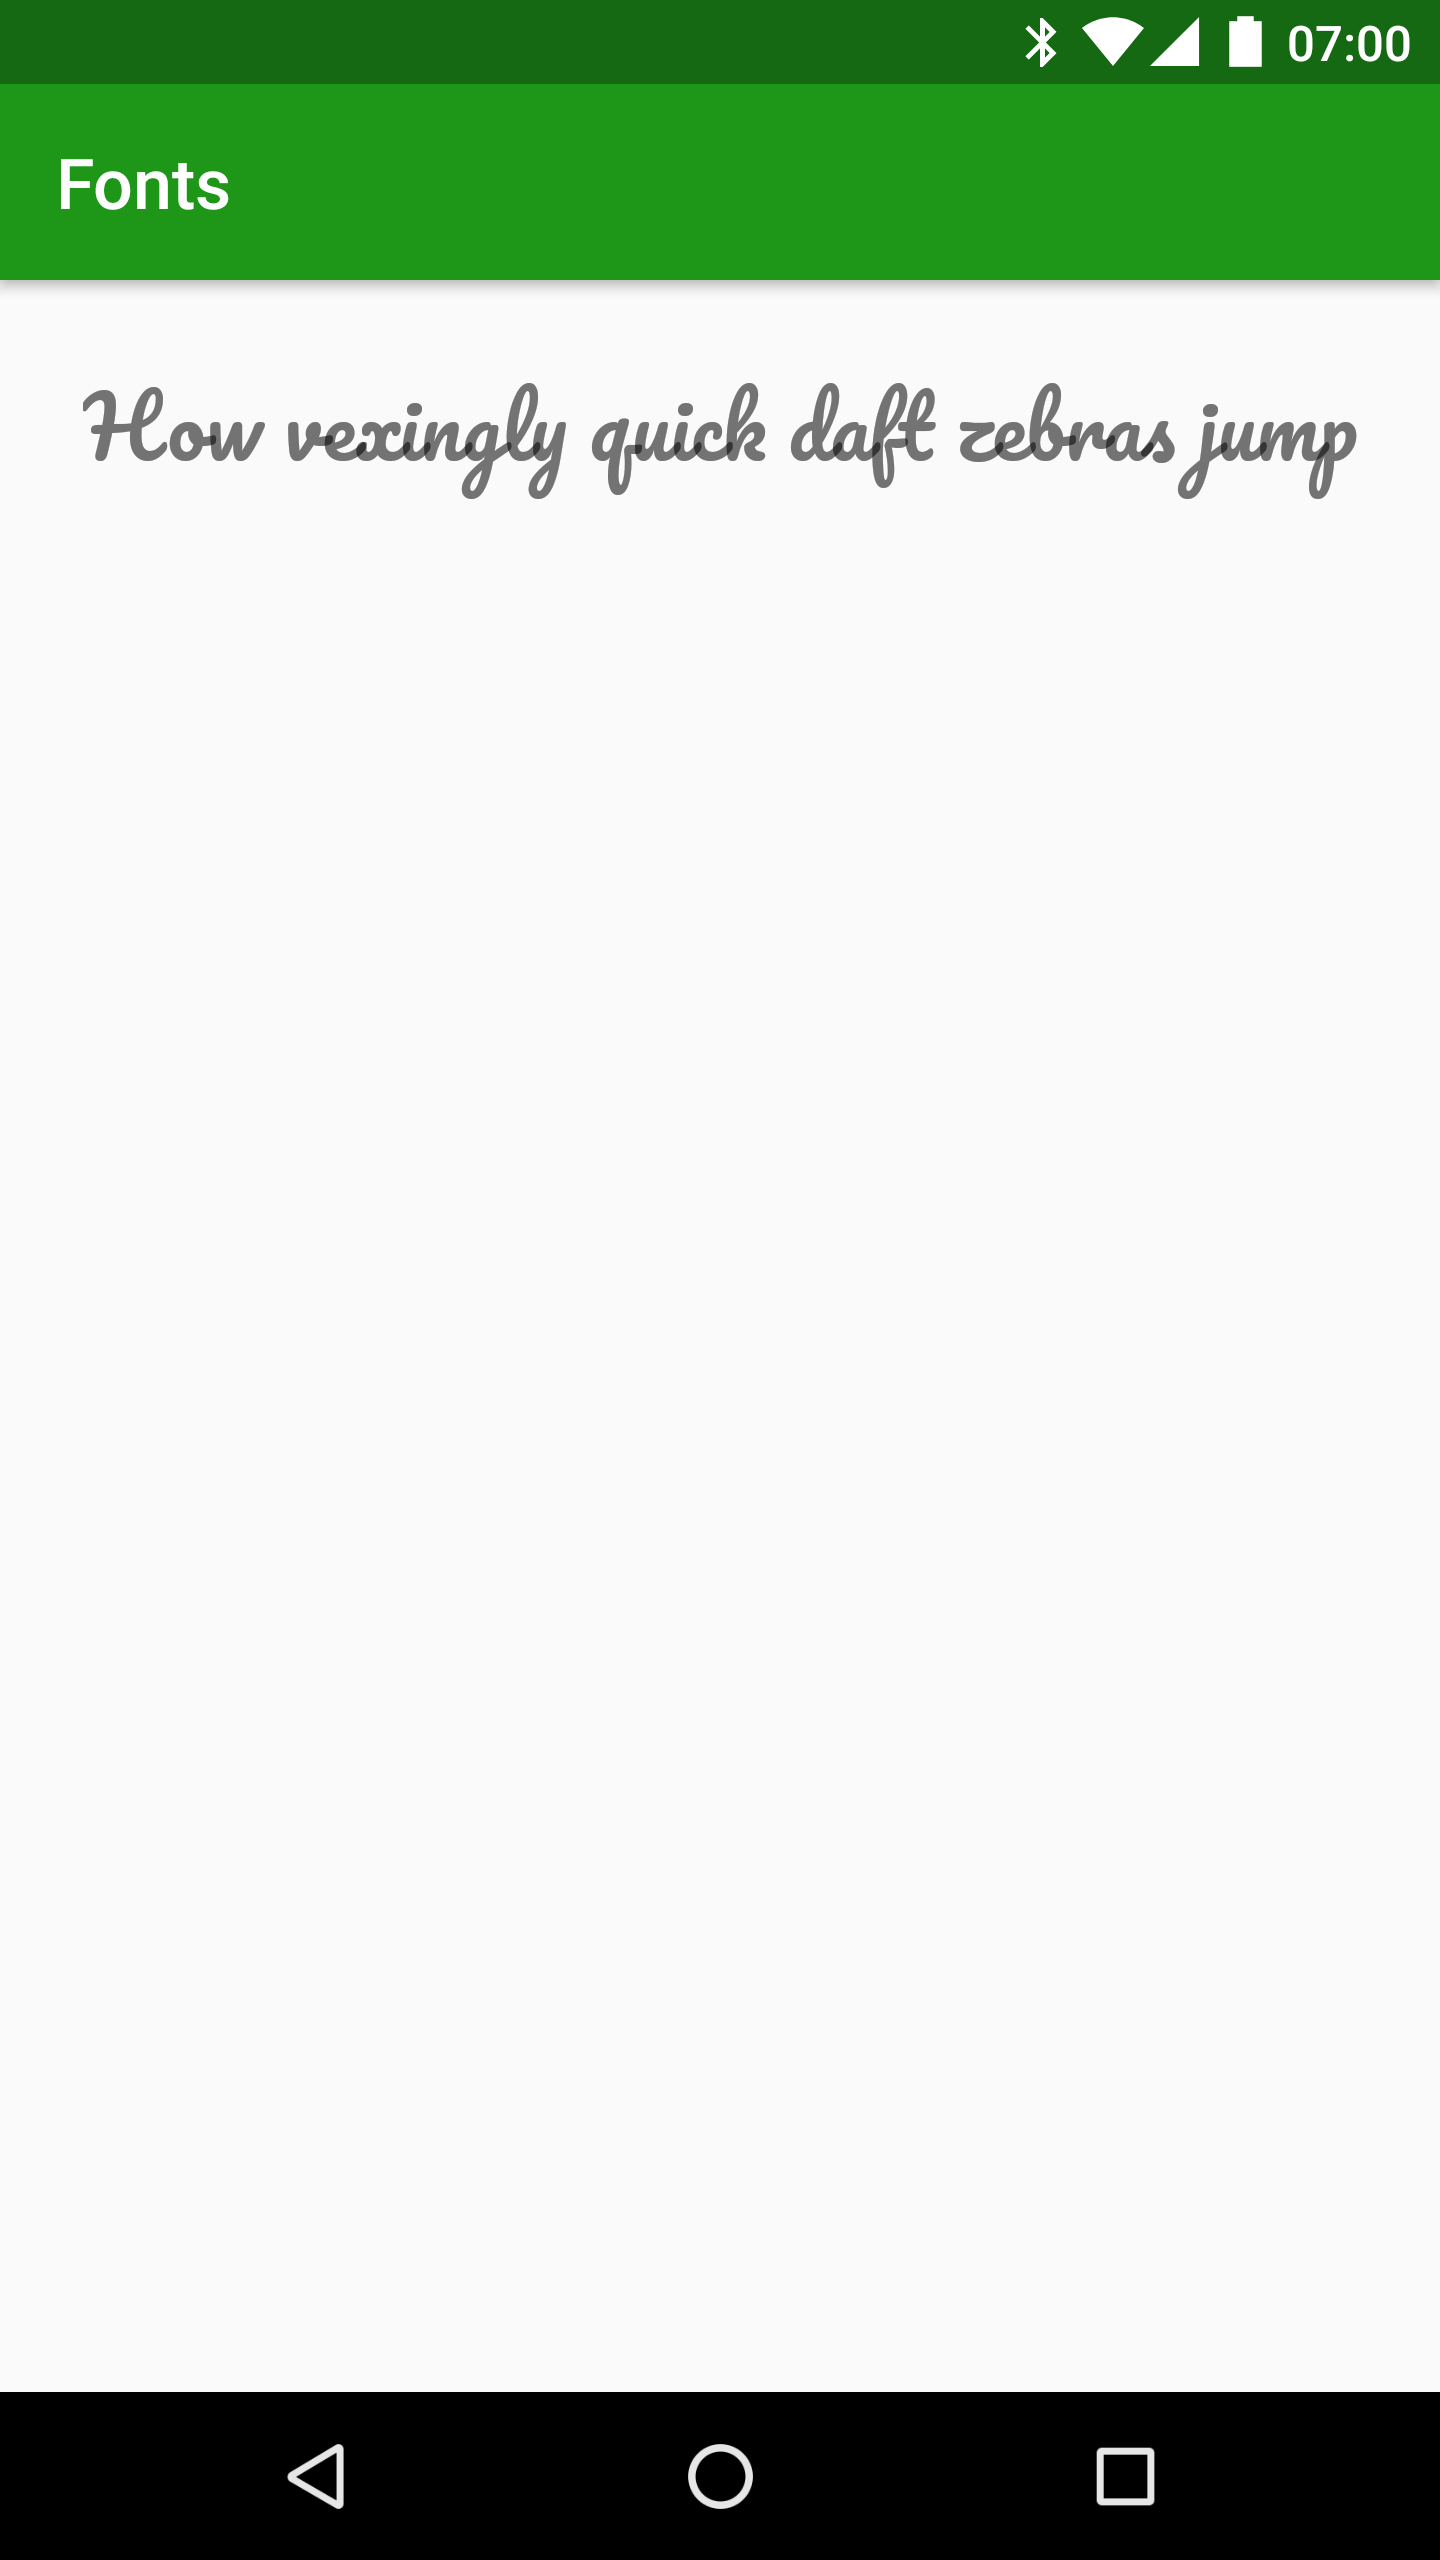
If we run that then, as we would expect, we see the new font used within the app:
So that’s all fairly easy but those who are familiar with fonts and typography will know that things aren’t always this simple. Whilst Pacifico is a single font represented by a single font file, often we have different variants of the same font each of which has its own individual font file. In the next article in this series we’ll take a dive in to font families.
The source code for this article is available here.
© 2017, Mark Allison. All rights reserved.
掘金翻译计划 是一个翻译优质互联网技术文章的社区,文章来源为 掘金 上的英文分享文章。内容覆盖 Android、iOS、React、前端、后端、产品、设计 等领域,想要查看更多优质译文请持续关注 掘金翻译计划。